There is something fundamentally nostalgic about the aroma of roasting peanuts wafting through a warm kitchen. These Oat Flour Peanut Butter Cookies represent the perfect marriage of rustic, wholesome ingredients and classic bakery-style indulgence. If you have been searching for a cookie that offers a soft-baked center and a satisfyingly crumbly texture without the use of traditional wheat flour, this recipe is your new gold standard.
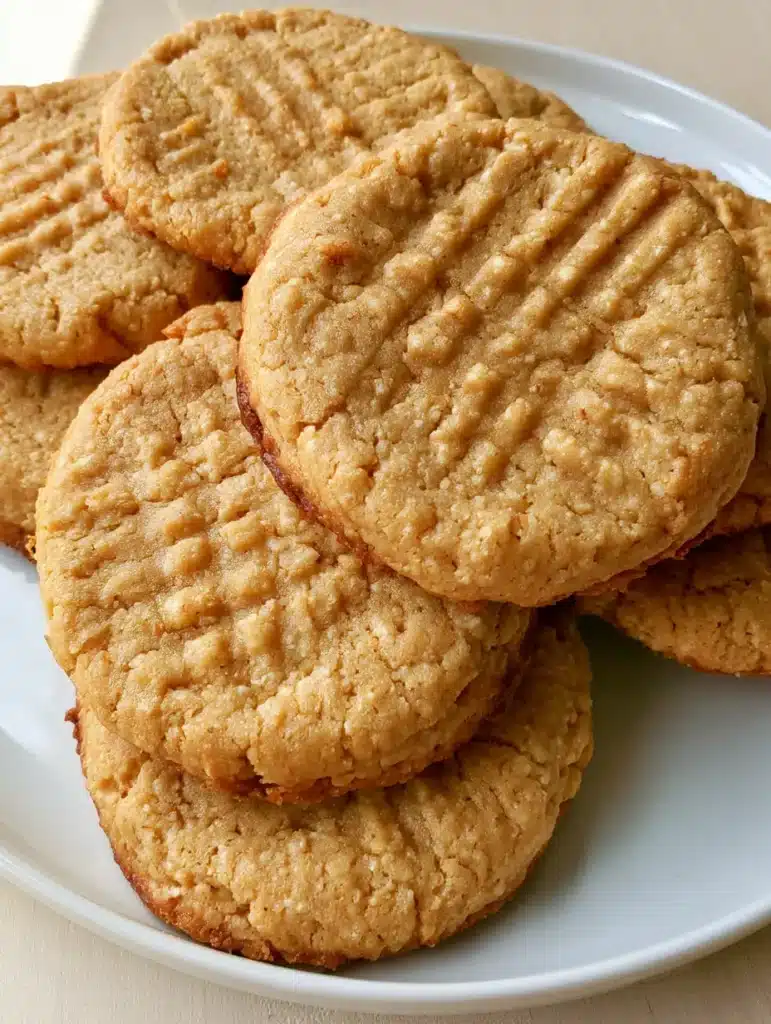
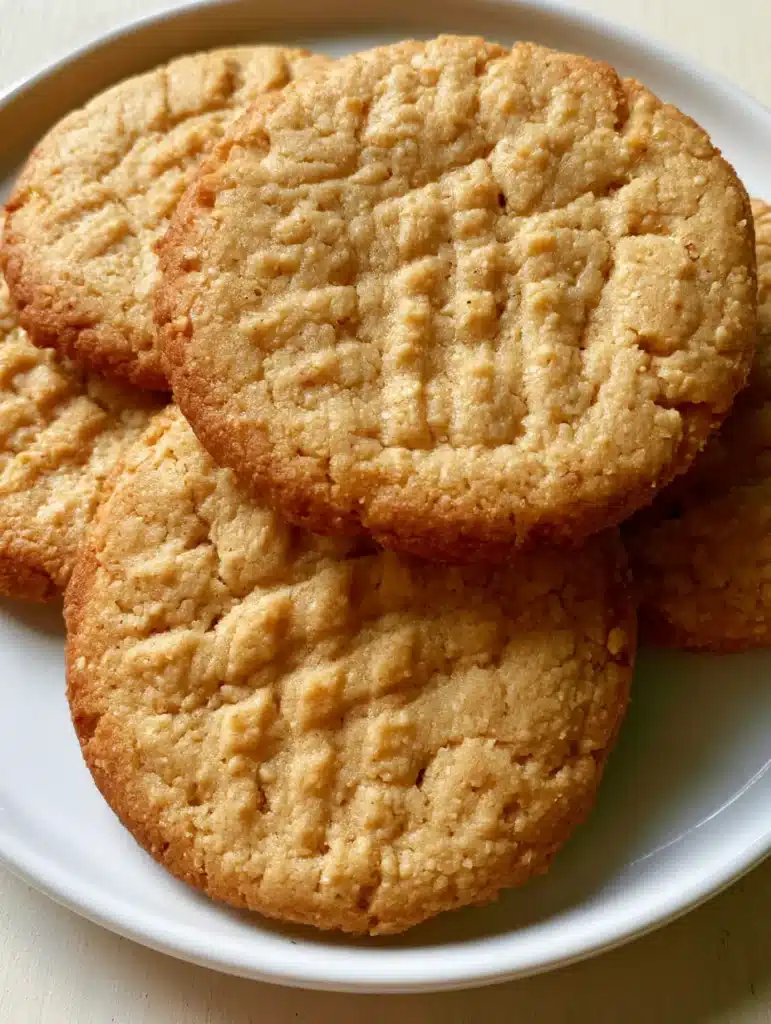
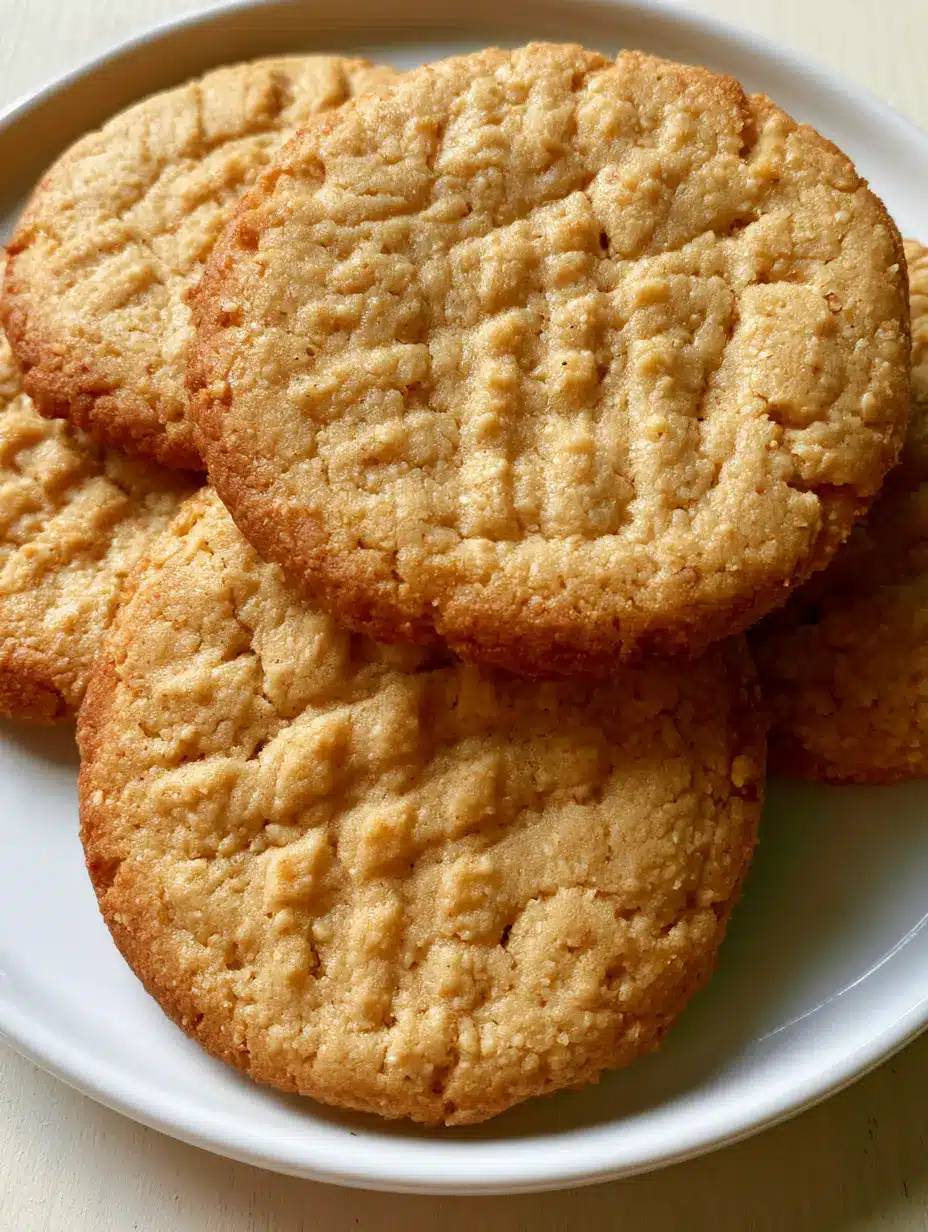
Visually, these cookies are a masterpiece of simplicity. Picture thick, round discs of golden-brown dough, each marked with a distinct fork-pressed crisscross pattern that catches the light from a nearby window. The matte surface reveals the fine, toasted grains of the oat flour, while the edges are baked to a slightly deeper, toasted hue, providing a delicate crunch that gives way to a melt-in-your-mouth interior.
Why These Wholesome Oat Flour Peanut Butter Cookies Are a Kitchen Essential
- Perfectly Soft-Baked Texture: Unlike crispy wafers, these cookies remain thick and tender, offering a soft-baked center that feels indulgent with every bite.
- Visually Iconic Design: The classic fork-pressed crisscross pattern isn’t just for show; it ensures the dense oat flour dough bakes evenly while providing that signature rustic look.
- Nutrient-Dense Foundations: By utilizing finely ground oat flour, we introduce a subtle, nutty flavor profile and a matte finish that looks beautiful on a white ceramic plate.
- Toasted Golden Edges: The specific baking temperature targets the Maillard reaction, resulting in edges that are lightly toasted to a deeper golden-brown for a complex flavor.
The Anatomy of a Flourless Masterpiece: Essential Ingredients
Creating the perfect Oat Flour Peanut Butter Cookies requires a deep understanding of how gluten-free grains interact with fats and sugars. Every ingredient in this list serves a scientific purpose to ensure your cookies don’t crumble into dust but rather hold their thick, soft shape.
Finely Ground Oat Flour: 2 cups (240g). This is the structural backbone of the recipe; it provides a soft, fine grain and a matte texture that absorbs the natural oils from the peanut butter perfectly.
Creamy Peanut Butter: 1 cup (250g). We use creamy peanut butter to ensure a smooth, homogeneous dough that allows the fork-press pattern to remain sharp and distinct after baking.
Unsalted Butter (Softened): 1/2 cup (115g). The butter provides the necessary fat for a tender crumb and helps achieve those beautiful golden-brown edges seen in the visual blueprint.
Light Brown Sugar: 3/4 cup (150g). Brown sugar is hygroscopic, meaning it pulls in moisture to keep the cookie centers soft-baked and chewy rather than dry.
Granulated White Sugar: 1/4 cup (50g). This helps in the browning process, ensuring the edges get that lightly toasted, deep golden hue during the final minutes in the oven.
Large Egg: 1 unit (approx. 50g). The egg acts as the primary emulsifier, binding the fats and flours together so the cookies don’t fall apart when stacked on a plate.
Vanilla Extract: 1 tsp (5ml). This enhances the natural earthiness of the oats and the saltiness of the peanuts for a well-rounded flavor profile.
Baking Soda: 1 tsp (5g). This provides the lift needed to make the cookies thick and prevent them from becoming overly dense hockey pucks.
Sea Salt: 1/2 tsp (3g). Salt is critical in peanut butter recipes to balance the sweetness and highlight the roasted nut notes.
Tools for Achieving the Perfect Crisscross Pattern
To recreate the high-angle, professional look of the visual prompt, you will need a few specific kitchen tools. The right equipment ensures that the dough behaves predictably and the final presentation is stack-worthy.
Large Mixing Bowl: Essential for aerating the butter and sugars together to create a light, soft-baked base. A sturdy bowl allows for vigorous mixing of the dense oat dough.
Electric Hand Mixer or Stand Mixer: To achieve the “soft-baked” texture, you must properly cream the butter and sugars until they are pale and fluffy.
Stainless Steel Cookie Scoop: To ensure every cookie is round and uniform, a scoop is necessary; this helps in stacking the cookies perfectly on a ceramic plate.
Heavy-Duty Baking Sheet: A thick sheet prevents the bottoms from burning before the edges reach that targeted golden-brown toasted color.
A Sturdy Dinner Fork: This is the most important tool for the “visual blueprint.” You will use this to create the signature crisscross pattern on the matte surface of the dough.
Step-by-Step Evolution of the Oat Flour Peanut Butter Cookie
1. Preparing the Wholesome Foundation
Begin by preheating your oven to 350°F (175°C). Line your baking sheet with parchment paper to ensure the cookies don’t stick and the bottoms remain a light, even brown. If you are making your own oat flour, pulse rolled oats in a high-speed blender until they reach a powdery, fine-grain consistency that mimics traditional flour.
2. Creaming for Volume and Softness
In your large bowl, combine the softened butter, creamy peanut butter, brown sugar, and white sugar. Beat on medium-high speed for at least 3 minutes. You are looking for a visual change: the mixture should turn from a dark tan to a lighter, whipped beige. This aeration is what makes the cookies “soft-baked” rather than dense and heavy.
3. Emulsifying the Wet Ingredients
Add the egg and vanilla extract to the creamed mixture. Continue to beat until the egg is fully incorporated and the dough looks glossy and smooth. This step ensures that the fats from the peanut butter and the moisture from the egg are perfectly combined, which prevents the cookies from becoming oily.
4. Incorporating the Oat Flour
Slowly fold in the oat flour, baking soda, and sea salt. Use a low speed or a spatula to avoid overworking the dough. You will notice the dough transition to a matte finish as the oat flour absorbs the moisture. The texture should be slightly crumbly to the touch but easily hold its shape when pressed together.
5. The Signature Fork-Press Technique
Scoop the dough into rounded balls, roughly 2 tablespoons (30g) each, and place them on the prepared baking sheet. Using a dinner fork, press down firmly in one direction, then rotate the fork 90 degrees and press again. This creates the distinct crisscross pattern. The edges of the cookie should crack slightly, giving it that rustic, handheld smartphone photo aesthetic.
6. Precision Baking for Golden Edges
Slide the tray into the center rack of the oven. Bake for 9 to 11 minutes. Watch for the sensory cues: the kitchen should smell intensely of toasted oats, and the edges of the cookies will transform into a deeper golden hue. The centers will still look slightly underdone and soft—this is the secret to a soft-baked result. They will firm up as they cool on the tray.
Pro-Tips for an Elite Cookie Texture
- Avoid Over-Baking: Oat flour treats can dry out quickly. Remove the cookies when the edges are toasted but the tops still look matte and slightly soft.
- Room Temperature Ingredients: Ensure your egg and butter are at room temperature to create a seamless emulsion. If the butter is too cold, the cookies won’t spread correctly, and the crisscross pattern may cause the dough to shatter.
- The Flour Rest: If time allows, let the dough rest for 10 minutes before scooping. This allows the oat flour to fully hydrate, resulting in a less “gritty” mouthfeel and a more cohesive soft-baked center.
- Natural Peanut Butter Caution: If using a “stir-style” natural peanut butter, ensure it is extremely well-mixed. Excess oil can cause the cookies to spread too much, losing the thick, round shape shown in our visual blueprint.
Curating the Perfect Dessert Spread
These Oat Flour Peanut Butter Cookies are a standout on their own, but they also pair beautifully with other decadent treats. If you are hosting a dessert party, consider serving these alongside our salted caramel cheesecake cookies (coming soon) for a contrast in textures.
For those who love a deeper cocoa profile, these cookies are a natural companion to flourless chocolate cookies. If you want to lean into the peanut butter theme, you could even crumble these over a slice of our legendary moist peanut butter cake.
If you prefer a lighter pairing, the subtle nuttiness of the oats is complemented by the floral notes in honey-infused cookies or the classic simplicity of fudgy chocolate crinkles.
Storage and Preservation for Maximum Freshness
To maintain the soft-baked center, store these cookies in an airtight container at room temperature for up to 5 days. Placing a small piece of white bread in the container is an old baker’s trick to keep the oat flour from drying out.
For long-term storage, these cookies freeze exceptionally well. Place the baked and cooled cookies in a freezer-safe bag for up to 3 months. When the craving hits, simply thaw at room temperature or warm in a 300°F (150°C) oven for 5 minutes to restore that “just-baked” golden-brown edge.
Answers to Your Baking Questions
This specific recipe uses an egg and butter for the soft-baked texture. You could experiment with a flax egg and vegan butter, though the golden-brown edges and structure may differ slightly.
Yes! Simply pulse rolled oats or quick oats in a high-speed blender until they reach a fine, flour-like consistency. Measure the oat flour by weight (240g) after grinding to ensure accuracy.
You can, but the results may vary. Traditional creamy peanut butter provides more stability. If using natural, ensure it is thoroughly stirred so no excess oil causes the cookies to spread too thin.
Oat flour is gluten-free and lacks the elastic structure of wheat. If they are too crumbly, you may have over-baked them or not used enough peanut butter/fat to bind the grains.
Because peanut butter cookie dough is typically very dense, it won’t spread naturally in the oven. Pressing them with a fork ensures they are the correct thickness for even baking and a soft center.
The Ultimate Oat Flour Peanut Butter Cookie Recipe
Oat Flour Peanut Butter Cookies: The Ultimate Soft-Baked Gluten-Free Treat
Ingredients
Equipment
Instructions
- In a large bowl, beat the softened butter, peanut butter, brown sugar, and white sugar until light and fluffy (about 3 minutes).
- Mix in the egg and vanilla extract until fully combined and smooth.
- Gradually add the oat flour, baking soda, and salt. Mix until a matte, slightly crumbly dough forms.
- Roll the dough into 2-tablespoon sized balls and place on a parchment-lined baking sheet.
- Use a fork to press a crisscross pattern into the top of each cookie, flattening them slightly.
- Bake at 350°F (175°C) for 9-11 minutes until the edges are golden-brown but the centers remain soft.
Notes
If making homemade oat flour, ensure it is processed into a fine powder to avoid a gritty texture.

Join the Baking Community!
We hope these Oat Flour Peanut Butter Cookies become a staple in your gluten-free baking rotation. The combination of the matte oat texture and the creamy peanut butter creates a snack that is both satisfying and wholesome. If you make these, please leave a comment below and let us know how your crisscross patterns turned out!
Don’t forget to snap a photo of your golden-brown cookies stacked on a white plate and tag us. For more recipe inspiration and visual guides, follow us on Pinterest and pin this recipe to your favorite dessert board!