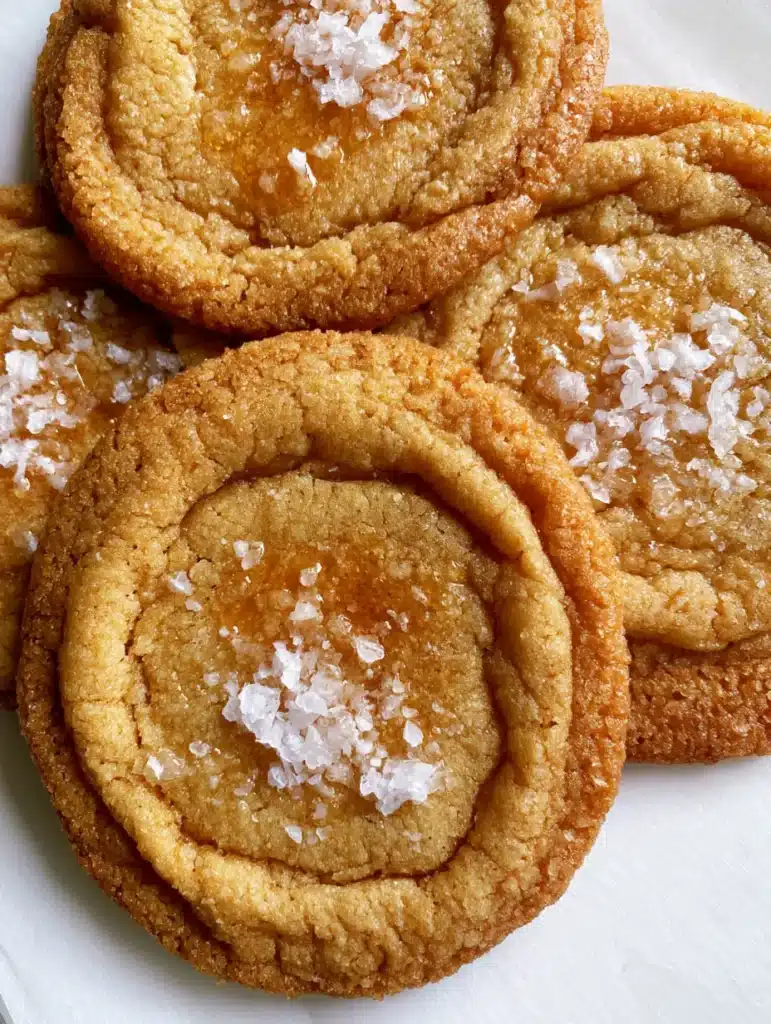
There is something inherently magical about the combination of liquid gold honey and the sharp, clean bite of sea salt. These Salted Honey Cookies aren’t just your average bakery find; they are a masterclass in texture and balanced flavor profiles. Imagine a cookie with a distinct, golden-blonde hue that glows under natural light, featuring edges that ripple and crinkle into a perfect chewy perimeter.
As you bite into the center, you find a soft, slightly sunken heart that remains incredibly moist. The finish is a luxurious, glossy amber honey glaze that catches the light, topped with a deliberate scattering of white flaky sea salt crystals. This recipe captures the essence of sophisticated comfort food, perfect for those who crave a dessert that is as visually stunning as it is delicious.
Whether you are a seasoned baker or just starting your culinary journey, these cookies offer a rewarding experience. The aroma of warm honey and browning butter will fill your kitchen, signaling the arrival of a treat that rivals any high-end patisserie. Let’s dive into the science and soul of these honey-infused delights.
Why You Will Obsess Over These Honey-Glazed Delights
- The Perfect Crinkle: Thanks to a specific leavening balance, these cookies develop beautiful, rippled edges that provide a satisfying crunch against the soft center.
- Glossy Amber Finish: A post-bake honey brush ensures a shimmering, artisanal look that highlights the natural beauty of the dough.
- Sophisticated Sweet-Salty Balance: The addition of large flaky sea salt crystals cuts through the floral sweetness of the honey for a complex flavor.
- Golden-Blonde Aesthetics: Unlike darker molasses-based cookies, these stay light and bright, making them a stunning addition to any dessert spread.
The Essential Pantry for Golden-Blonde Perfection
High-Quality Honey: This is the soul of the cookie. Use a floral honey like clover or orange blossom to achieve that signature amber sheen and delicate flavor profile.
Unsalted Butter (Room Temperature): 1 cup (227g) of quality butter provides the foundational fat. Ensure it is soft to the touch but not melting to maintain the proper emulsion during the creaming stage.
Granulated and Light Brown Sugar: A mix of 3/4 cup (150g) white sugar and 1/4 cup (50g) brown sugar. The white sugar encourages the crinkled edges, while the brown sugar keeps the sunken center moist and chewy.
All-Purpose Flour: 2 ¼ cups (280g) provides the necessary structure. Using a kitchen scale is recommended for accuracy to prevent the cookies from becoming cakey.
Large Egg and Vanilla Extract: One egg (50g) adds binding power, while 1 tbsp (15ml) of pure vanilla extract enhances the floral notes of the honey.
Baking Soda and Cream of Tartar: This specific leavening duo creates the “puff and fall” effect. This is what leads to those gorgeous sunken centers and rippled edges.
Flaky Sea Salt: Not just any salt—Maldon or a similar large-crystal salt is required. It provides the visual “pop” and the essential textural contrast seen in the visual blueprint.
Tools Required for Artisan Cookie Success
To achieve the handheld smartphone photo look from our guide, you need a few specific tools. A large, rimmed baking sheet is essential for heat distribution. You will also need parchment paper; it ensures the cookies don’t stick and provides that clean, neutral background for your own photography.
A 2-tablespoon cookie scoop is vital for uniformity. If your cookies are different sizes, they won’t bake at the same rate, and you’ll miss out on that overlapping, circular arrangement. Finally, a small pastry brush is needed for the amber glaze to achieve that glossy, moist texture in the center.
The Science of the Perfect Honey Crinkle: Step-by-Step
1. Creaming for Structure and Aeration
In a large bowl or stand mixer, beat the room-temperature butter and both sugars for at least 3-4 minutes. You are looking for a pale, fluffy consistency. This process creates tiny air pockets that the baking soda will later expand, contributing to the “crinkle” effect.
2. Incorporating the Liquid Gold
Add the egg, vanilla, and 1/4 cup (60ml) of honey to the creamed mixture. Beat on medium speed until fully emulsified. You will notice the batter take on a slightly glossy, golden hue at this stage, which is the first hint of the final golden-blonde result.
3. Sifting the Dry Foundation
In a separate bowl, whisk together the flour, baking soda, cream of tartar, and ½ tsp (3g) of fine sea salt. Gradually add the dry ingredients to the wet. Mix until just combined; overmixing at this stage will develop too much gluten, making the cookies tough rather than chewy.
4. The Essential Chill Period
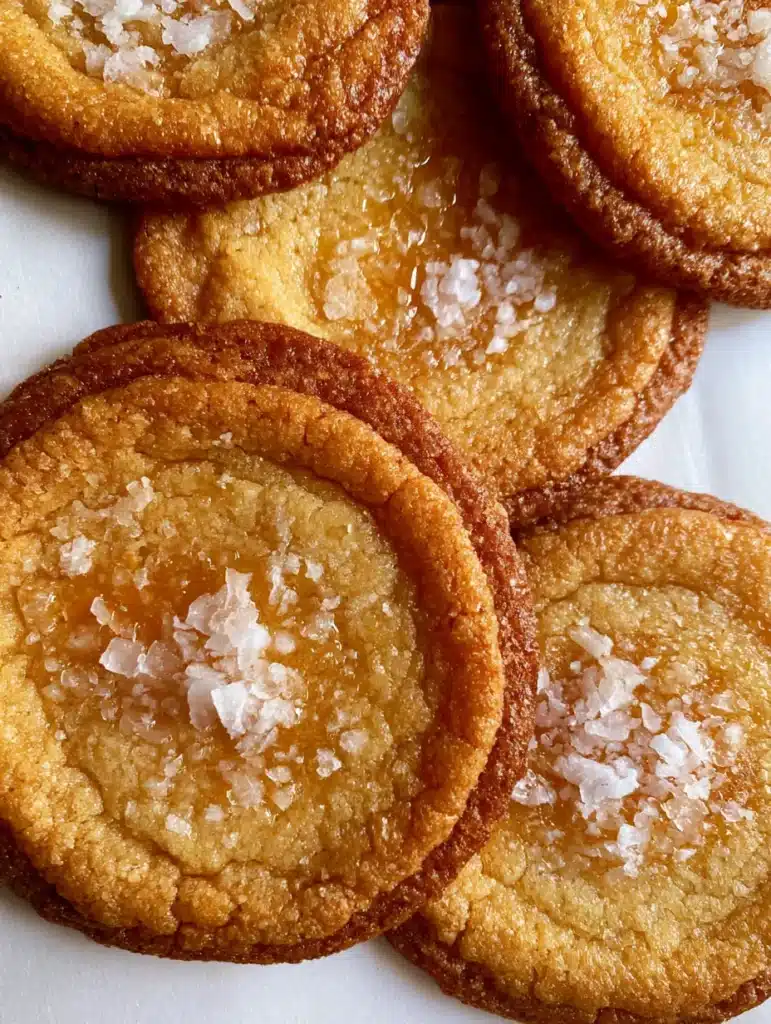
Chill the dough for at least 30 minutes. This prevents the cookies from spreading too thin and ensures the center stays thick and sunken while the edges crisp up. This step is non-negotiable for achieving the “moist, soft texture” described in the visual prompt.
5. Precision Scooping and Baking
Preheat your oven to 350°F (175°C). Scoop 2-tablespoon (approx. 40g) balls of dough and place them 3 inches apart on the parchment. Bake for 10-12 minutes. Watch for the “Visual Cue”: the edges should be a deeper golden brown and rippled, while the centers still look slightly underdone and pale.
6. The Pan-Banging Technique
For those extra crinkled edges, halfway through baking, lift the pan about an inch and let it drop against the oven rack. This causes the risen cookie to collapse, creating those beautiful concentric ripples and a sunken center.
7. The Signature Amber Glaze and Salt Finish
Immediately after removing the cookies from the oven, use a pastry brush to lightly dab the center of each cookie with a small amount of warm honey. This creates the “glossy amber sheen.” While the glaze is still wet, generously scatter the white flaky sea salt crystals across the top.
Expert Tips for Bakery-Quality Results
- Room Temperature is Key: Ensure your egg and butter are at the same temperature to prevent the batter from curdling.
- Don’t Overbake: These cookies should look slightly “wet” in the very center when they come out. They will firm up as they cool on the pan.
- Use a Circular Cutter: If your cookies aren’t perfectly circular, place a large round cookie cutter over them immediately after baking and move it in a circular motion to “scoot” the edges into a perfect circle.
- Honey Selection: Avoid very dark honey like buckwheat for this recipe, as it will overpower the blonde color and turn the dough a muddy brown.
How to Store and Preserve the Texture
These Salted Honey Cookies are best enjoyed within the first 24 hours when the edges are at their crispiest. However, they store beautifully in an airtight container at room temperature for up to 5 days. To maintain the “sunken chewy center,” place a small piece of white bread in the container; the cookies will absorb the moisture from the bread.
For long-term storage, you can freeze the baked cookies for up to 3 months. When ready to eat, let them thaw at room temperature. If you want to regain that glossy look, a very brief (5-second) zap in the microwave will reactivate the honey glaze.
What to Serve with These Honey-Salted Treats
These cookies are the perfect conclusion to a meal featuring bold, savory flavors. If you love the honey theme, try serving these after a dinner of honey butter chicken or honey garlic chicken. The sweet and salty profile also pairs exceptionally well with a glass of cold milk or a nutty espresso.
If you’re looking to build a diverse cookie platter, these pair beautifully alongside chocolate crinkle cookies for color contrast or lemon sugar cookies for a bright, citrusy balance. For those who enjoy a bit of spice, serving them alongside salted honey cinnamon cookies creates a wonderful flavor bridge.
Frequently Asked Questions
You can, but you will lose the visual appeal and the specific textural ‘crunch’ of the flakes. Table salt is also much saltier by volume, so use only a tiny pinch if substituting.
Yes. Chilling the dough controls the spread in the oven. Without it, the cookies may become too thin and lose the distinct contrast between the crispy edges and the soft center.
Use the ‘pan-banging’ technique. Halfway through baking, lift the pan and drop it against the oven rack. This creates ripples by causing the dough to spread and fold onto itself.
A light, floral honey like clover, acacia, or orange blossom is best. These varieties provide the signature golden-blonde color and a delicate sweetness that doesn’t overpower the butter.
The sunken center is a desired trait for this recipe! It is caused by the balance of baking soda and cream of tartar, which makes the cookies puff up and then gently collapse, creating a chewy, moist heart.
The Ultimate Salted Honey Cookies Recipe
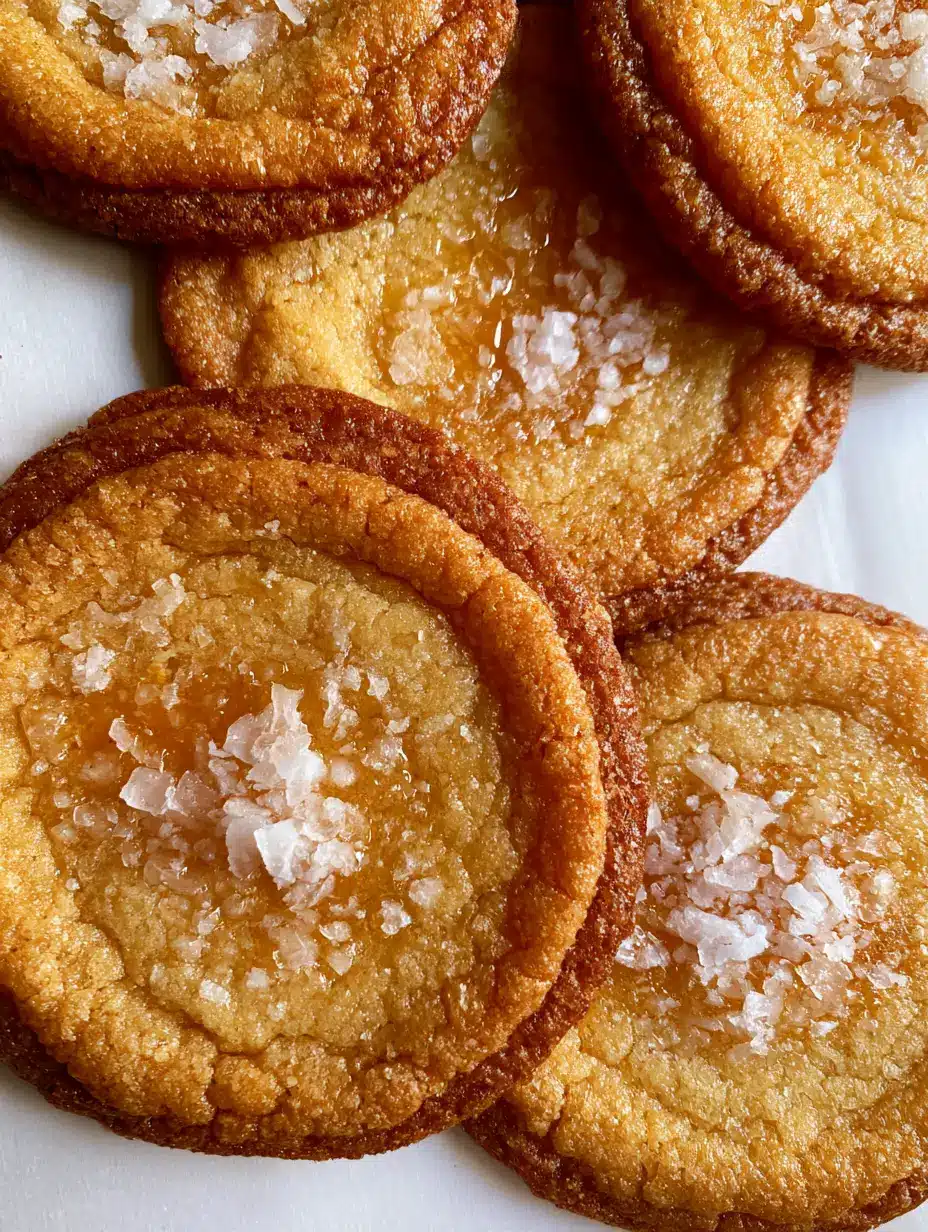
Salted Honey Cookies: The Ultimate Chewy, Golden-Blonde Recipe
Ingredients
Equipment
Instructions
- Cream the butter, granulated sugar, and light brown sugar in a stand mixer for 3-4 minutes until pale and fluffy.
- Mix in the egg, honey, and vanilla extract until smooth and glossy.
- Gradually add the flour, baking soda, cream of tartar, and fine salt. Mix until just combined.
- Cover and chill the dough in the refrigerator for at least 30 minutes.
- Preheat oven to 350°F (175°C). Scoop 2-tablespoon portions and place 3 inches apart on parchment-lined sheets.
- Bake for 10-12 minutes, using the pan-banging technique halfway through to create crinkles. Remove when edges are golden brown.
- While warm, brush the centers with extra honey to create a glossy amber sheen.
- Generously sprinkle flaky sea salt over the wet honey glaze.
Notes
Use high-quality floral honey for the best amber visual result.

Join the Table and Share Your Creations!
The beauty of these Salted Honey Cookies lies in their simplicity and the high-quality ingredients that make them shine. We would love to see how your golden-blonde cookies turned out! Did you achieve those perfect rippled edges and that glossy amber center? Leave a comment below and let us know your results.
For more culinary inspiration and visual recipe guides, be sure to follow us and save this recipe to your favorite boards on Pinterest. Happy baking!